
FlowJoTM allows you to import or create into a workbench as many matrices as you need, and apply them to samples as desired.
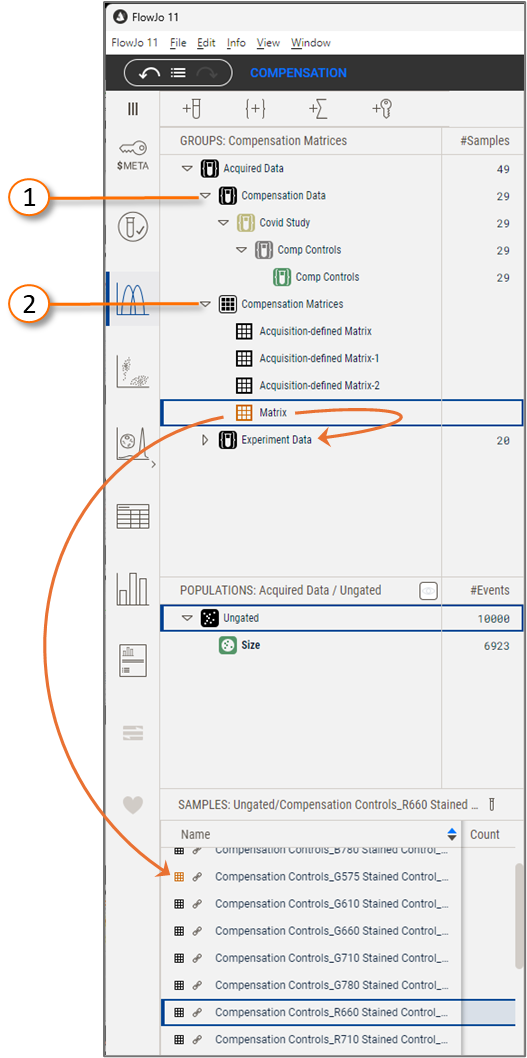
Figure 1. Matrix management elements
Number | Description |
|---|---|
1 | Groups of compensation/unmixing controls |
2 | Set of compensation/unmixing matrices |
FlowJoTM version 11 has two sections of the hierarchy dedicated to compensation/unmixing. The first one is a group dedicated to Compensation Data. All compensation controls are sub-grouped by experiment and stored here to make it easier to identify sets of controls and to separate them from the Experimental Data (Figure 1.1). For more information see the Group Panel page.
The second section is a group of compensation/unmixing matrices. All matrices in the workbench are listed (Figure 1.2). In the example above, there are three acquisition matrices and one matrix newly created in FlowJoTM. Acquisition matrices, matrices created by an acquisition software, are colored black by default. Matrices created in FlowJoTM receive any other color, that can be changed by right-clicking on the grid icon next to the matrix name.
To apply a matrix, simply drag and drop it to either an individual sample or a group of samples (Figure 1). The matrix icon next to a sample displays the color of the matrix allowing you to see at a glance which matrix has been applied to each file.
To edit a matrix, select it from the matrix list in the hierarchy, open the compensation editor and click the Edit Matrix button (Figure 2). This will display the selected matrix, and enable editing. When you save an edited matrix, a new matrix with the words -edited added to the name is created, so that you will always be able to revert to the original.
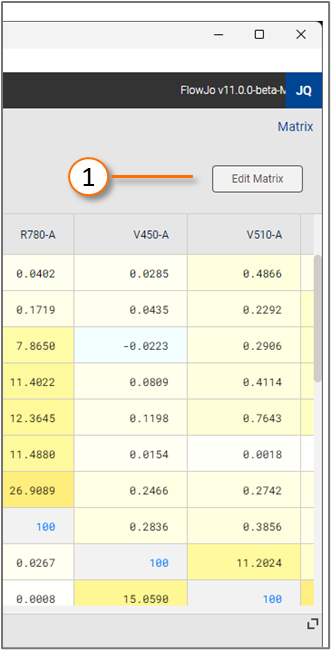
Figure 2. Matrix editing
For more information on editing a matrix, see the Editing Matrices page (Coming soon!).