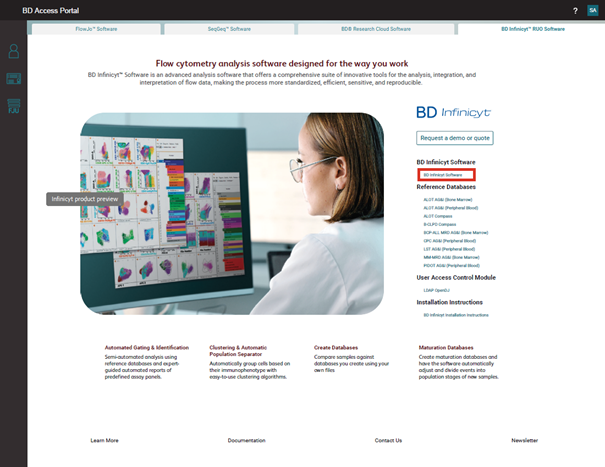
Below is a summary of the installation instructions. Detailed, step-by-step installation guidance is available on the BD Access Portal under the BD Infinicyt Software tab
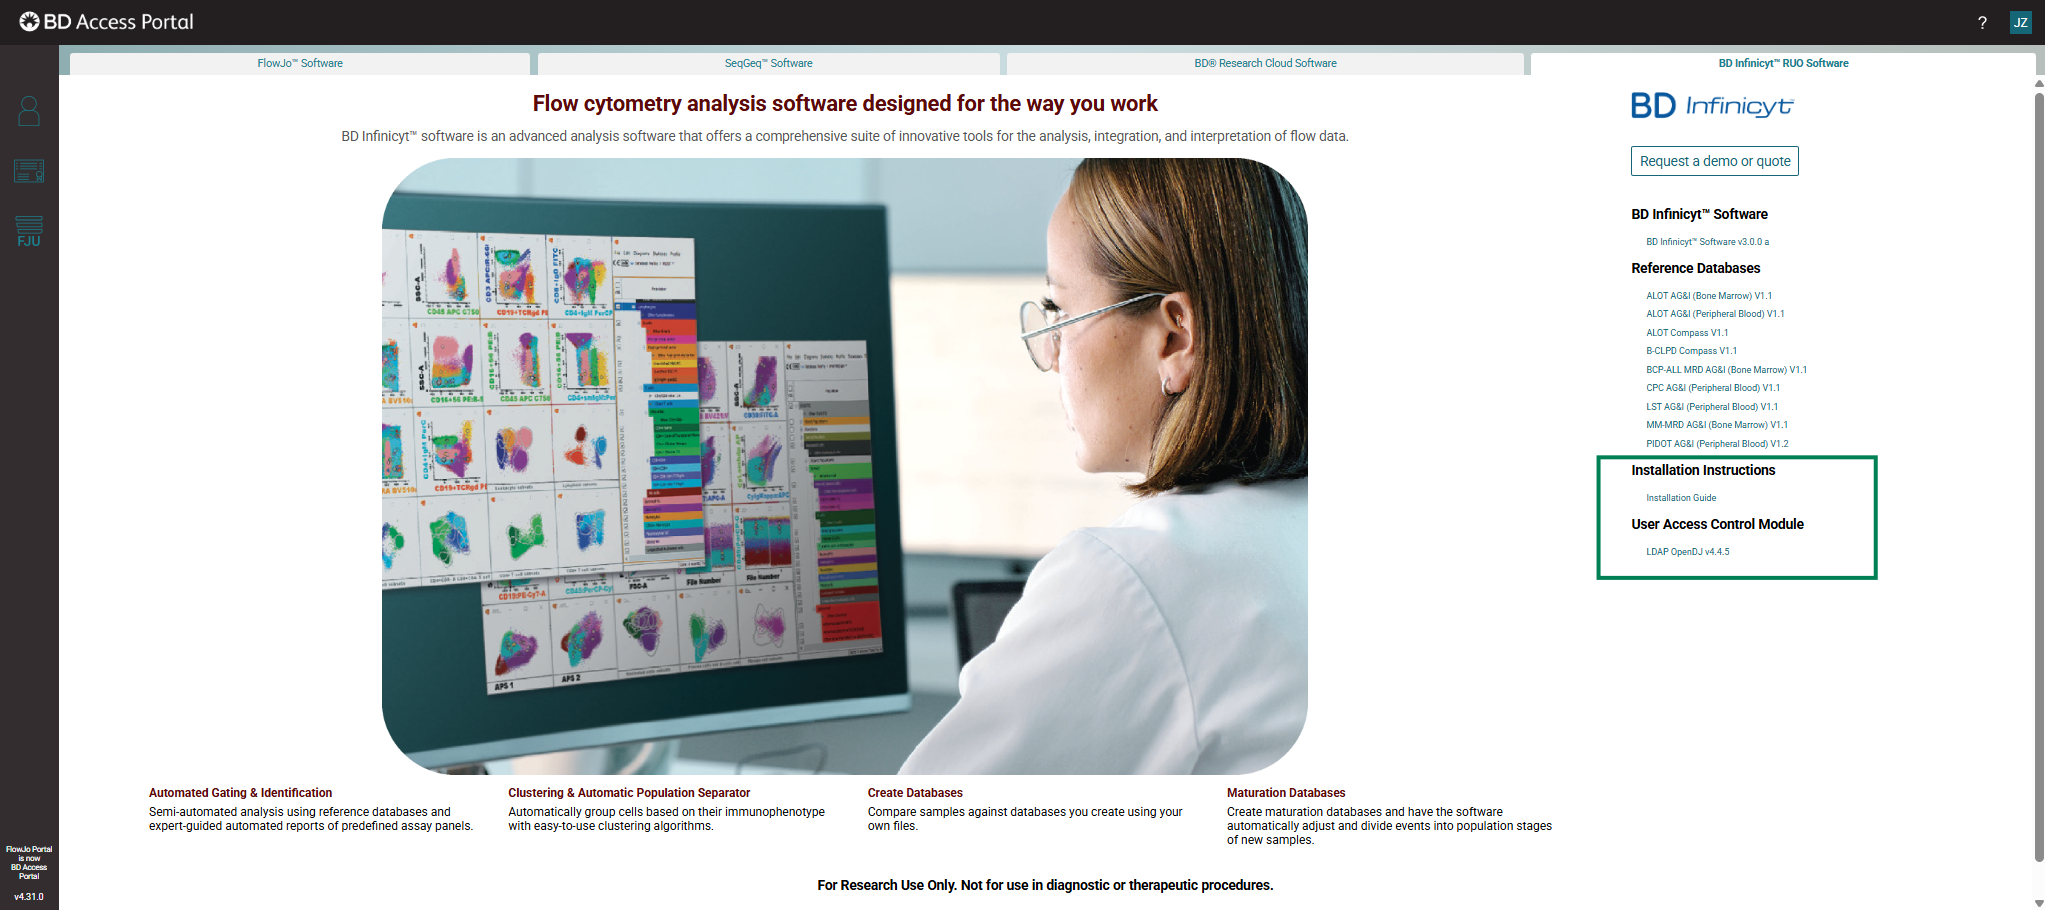
Note: To install the optional User Access Control module, you must first download and install the Lightweight Directory Access Protocol (LDAP) OpenDJ Server application. This application must be installed prior to installing the BD Infinicyt™ Software. The LDAP application is available through the BD® Access Portal. Please refer to the BD Access Portal for detailed installation instructions.
Minimum recommended requirements
BD Infinicyt™ Software can be installed on a computer running Microsoft® Windows 10® and Windows 11® operating systems (64-bit versions).
BD Infinicyt™ Software | BD Infinicyt™ Software + All databases |
Hard drive: 20 GB | Hard drive: 40 GB |
RAM: 8 GB | RAM: 16 GB |
CPU: 64-bit - Intel®, AMD, or equivalent | CPU: 64-bit – Multicore with 8 or more logical cores |
Display: 1920 × 1080 | Display: 1920 × 1080 |
Graphics card: Compatible with either OpenGL® 1.3 or later, or DirectX® 9.0 or later | Graphics card: Compatible with either OpenGL® 1.3 or later, or DirectX® 9.0 or later |
Installing the BD Infinicyt™ Software
Note: You need administrator rights on the computer to install BD Infinicyt™ Software.
Note: The installation process may take some time.
- Download the BD Infinicyt™ Software installer from the BD Access Portal.
Note: If you need user access control, then install OpenDJ prior to installing BD Infinicyt.
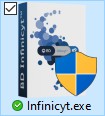
- In the directory where the BD Infinicyt™ Software installation file was downloaded, double-click the Infinicyt.exe icon.
- The following pop-up window will be displayed to allow the application to perform changes in your device.

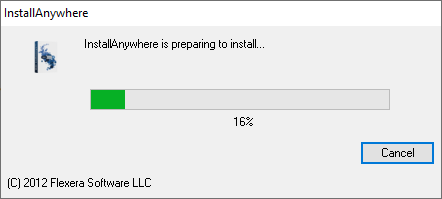
- Click Yes to continue. Wait while the installation is being prepared.
- In the Installation wizard, choose the language (English or Spanish). Then click OK to continue.
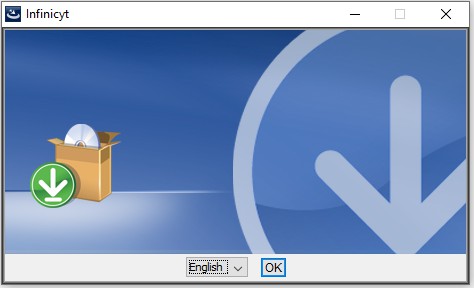
Note: If you have a version of BD Infinicyt™ Software already installed, the software will run in the previously configured language, even if a different language was selected for installation. You can change the language within the software after installation is complete.
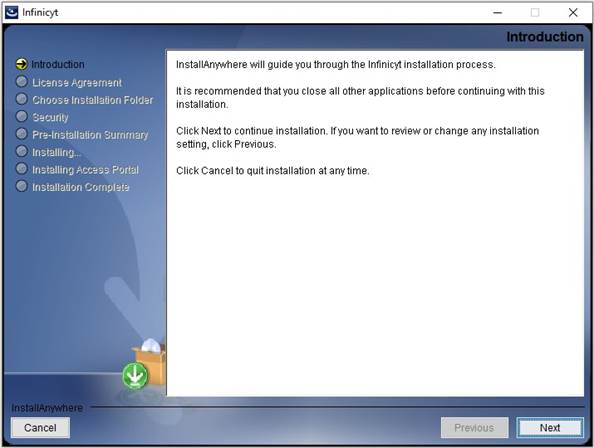
- On the Introduction step, click Next.
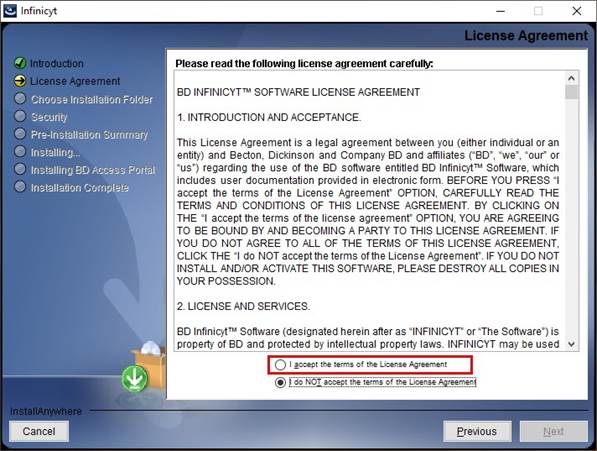
- Read the text in the License Agreement step carefully, select I accept the terms of the License Agreement, and then click Next. If you do not accept the terms of the License Agreement, the installation will be abandoned.
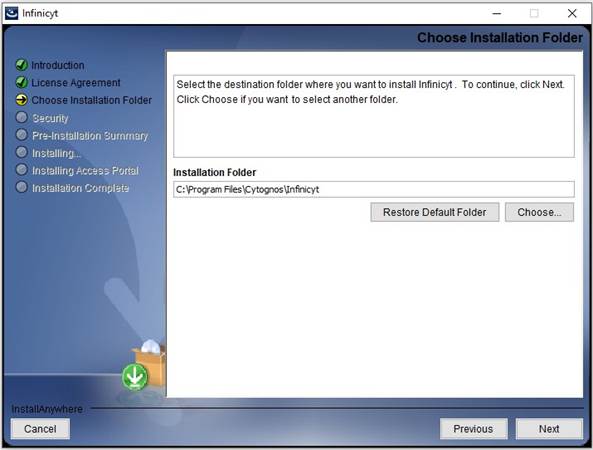
- On the Choose Installation Folder step, use the default folder or select a new folder and then click Next.
- On the Security step, select an option depending on whether or not you intend to install user access control on your workstation.
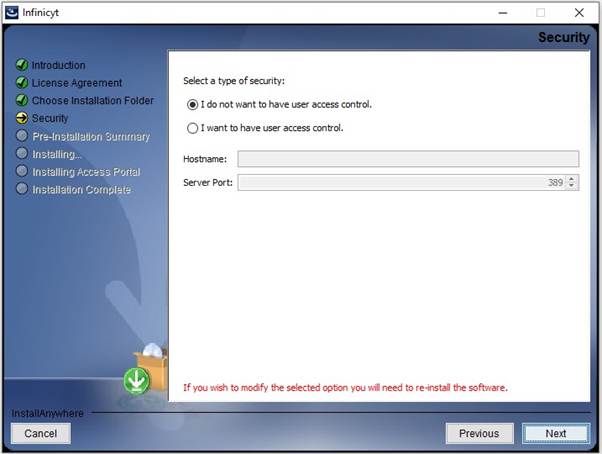
If you elect to have user access control, the Server Port should be populated by default, as configured in the LDAP application. Hostname should correspond to the Fully Qualified Host Name specified during the OpenDJ Server setup—refer to the complete Installation instruction for detials.
- Click Next to continue.
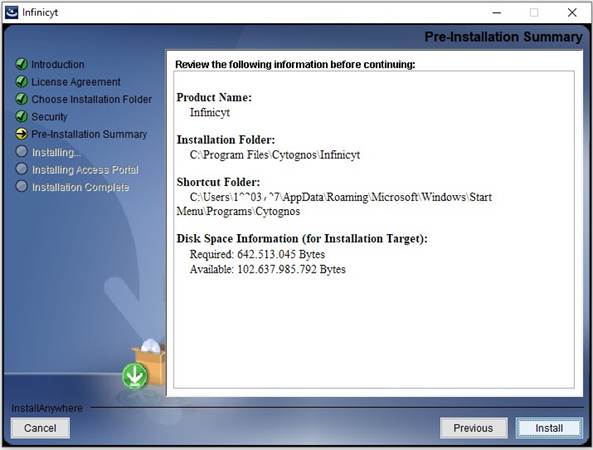
- On the Pre-installation Summary step, review the required and available disk space information. If the available space is greater than the required space, click Install.
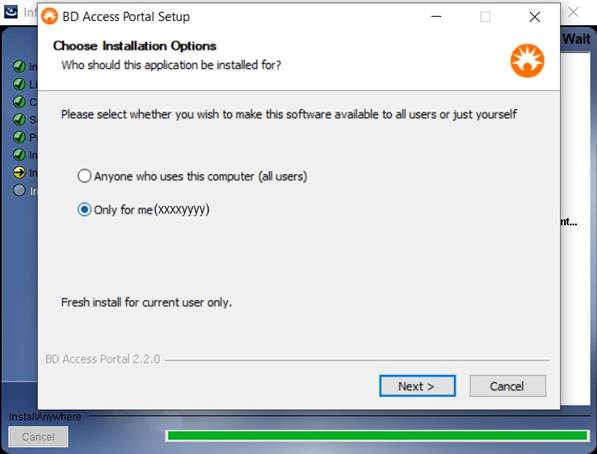
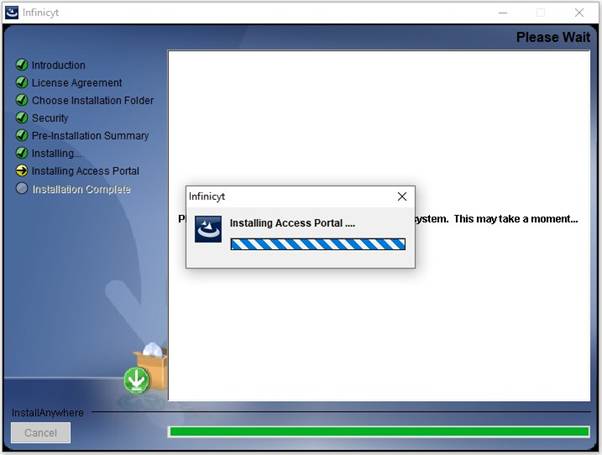
- On the Installing Access Portal step, the Installation wizard displays a BD Access Portal Setup window allowing you to select whether software is installed for all users or just yourself.
- The Installation wizard prompts you for the installation folder for the BD Access Portal application. Accept the default path provided in the Destination Folder field or click Browse to select another path.
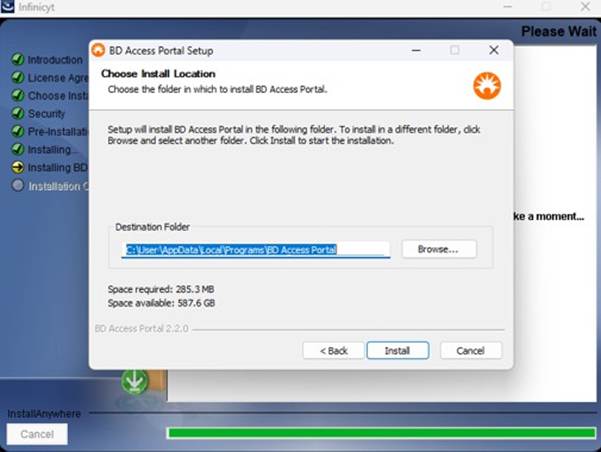
- Click Install to proceed with the installation of the BD Access Portal application on your computer.
Note: You might encounter a Windows Security pop-up with the following message: “Windows Firewall has blocked some features of BD Access Portal on all public and private networks.” If this occurs, click Cancel before proceeding to the next step.
- When installation of the BD Access Portal application has completed, the installation wizard displays the following window:
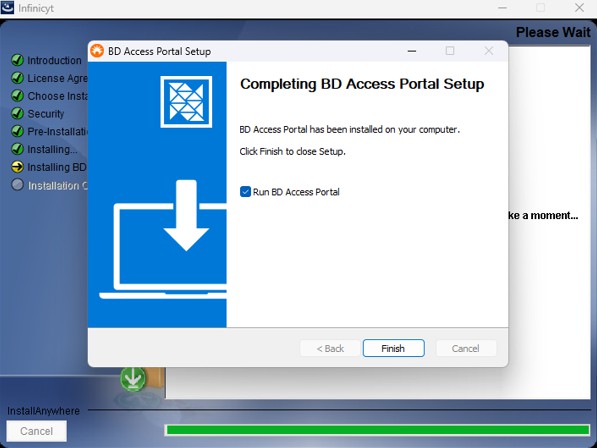
- If you intend to run the BD Infinicyt™ Software immediately after installation, either make sure that the Run BD Access Portal checkbox is selected or start the BD Access Portal application before starting the BD Infinicyt™ Software for the first time, as described in "Starting the BD Infinicyt™ Software for the fiirst time" detials below. Click Finish to dismiss the dialog.
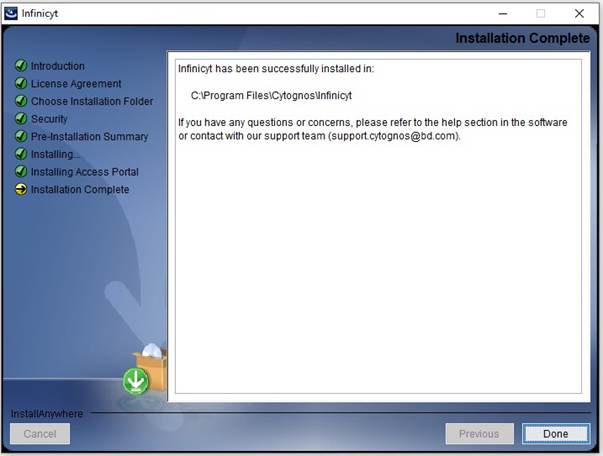
- On the Installation Complete step, click Done.
- At this stage, if a pop-up window is displayed to notify that the Access Portal has been blocked, click the Allow Access tab.
Note: At the end of the installation, a page will be displayed that will allow you to view the ReadMe file. It contains relevant information regarding the recently installed version.
Starting the BD Infinicyt™ Software for the first time
If User Access Control is installed, this operation must be performed by the BD Infinicyt™ Software administrator. The administrator will add other users.
- Before starting the BD Infinicyt™ Software for the first time, start the BD Access Portal application, which will prompt you to enter your email address and password. The BD Access Portal login credentials validate your BD Infinicyt™ Software license and are not to be confused with the credentials managed under User Access Control.
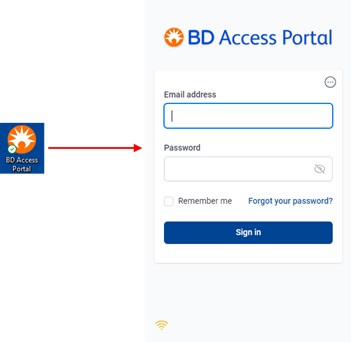
Note: This step is only necessary when running the BD Infinicyt™ Software for the first time. On subsequent startups, the software automatically displays a BD Access Portal pop-up window for you to enter your portal credentials.
- Double-click the Infinicyt icon installed on your computer desktop.

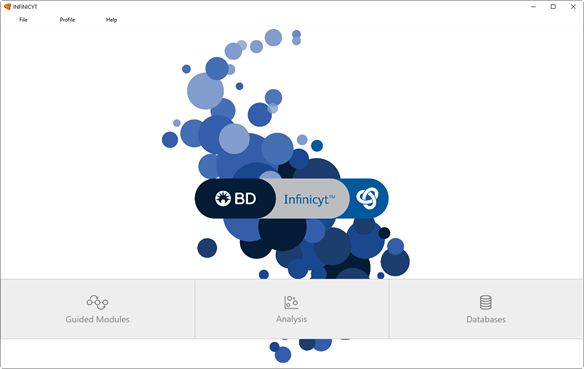
- If User Access Control is not installed, the BD Infinicyt™ Software will start and display its main window:
Importing databases
- Download the databases from the BD Access Portal according to your needs.

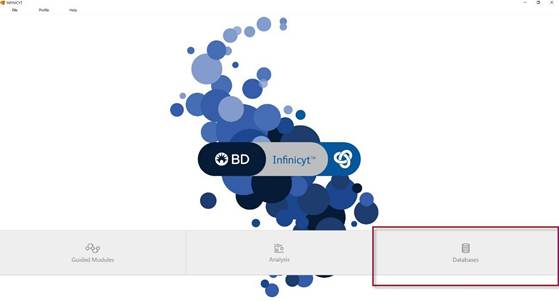
- Open the BD Infinicyt™ Software and click Databases.
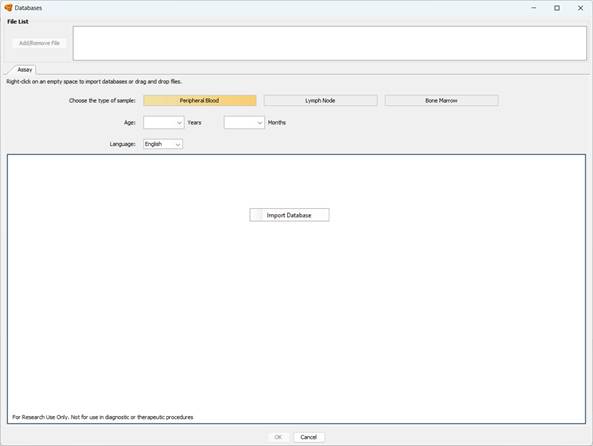
- Right-click any empty space in the large white panel and select Import Database.
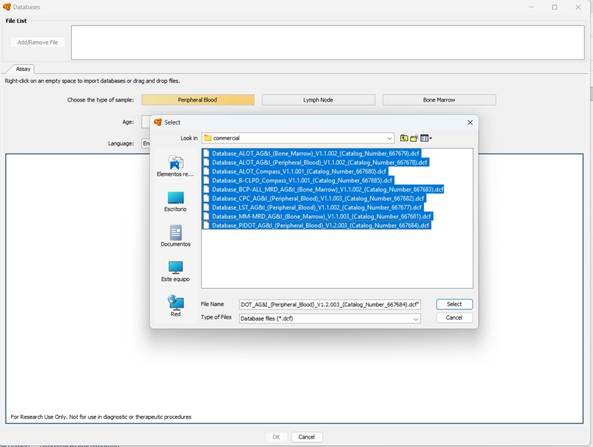
- The Select window will be displayed. Go to the folder where the databases have been downloaded, select all the listed files (click the first file, press the Shift key, then click the last file), and click Select.
Note: Because the database files are large, it may take a few minutes for the import operation to complete.
Warning:
By default, Windows limits pathnames to a maximum of 260 characters including the null terminator. In systems with this limitation, errors will occur if downloading DCF files to paths that exceed this number of characters.
Warning:
When downloading the databases make sure that they maintain their original names. If you download a database more than once, one of the databases must be moved or removed and any number in parentheses that Windows might have added to the filename must be removed.
- This completes the database import operation. All imported databases will be displayed within the software:
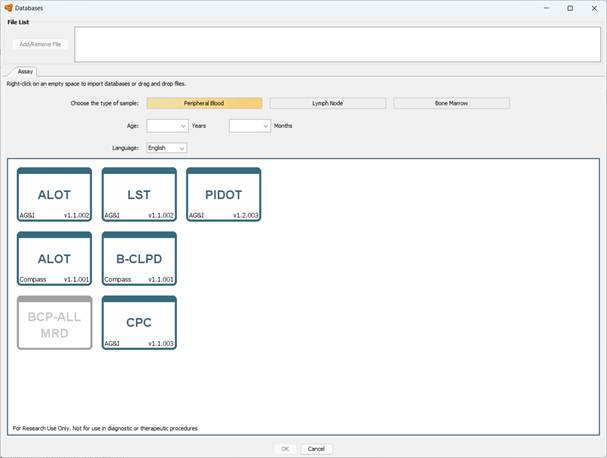
Note: Because no files are selected for analysis, the OK button for the Databases window will remain disabled.
- Click Cancel to close the Databases window.
Note: Ensure that your database versions are up-to-date prior to starting the analysis process.