
Below are instructions for granting “Full Disk Access” to FlowJo on MacOS’s Ventura and newer for proper Dongle detection.
Please note that due to a change in MacOS, Dongles will not authenticate FlowJo 10.8.1 or older versions, on MacOS Ventura. We released an updated build, FlowJo v10.8.2, which addresses this issue and supports Dongle authentication on MacOS Ventura (v10.8.2 also works on previous MacOS’s).
The Mac-only 10.8.2 installer for this update can be downloaded from our website here: https://www.flowjo.com/solutions/flowjo/downloads
Once installed, please make sure to provide FlowJo with the “Full Disk Access” permissions shown below. Please note, on MacOS Ventura, you may also have additional accessory permissions that need to be granted but not all MacOS’s on Ventura have these accessory security options.
Text-only Instructions:
1. Open up your MacOS System Settings (Apple icon -> System Setting) and select Privacy & Security from the list on the left-hand panel
Note: If you have the option, you may want to select Always Allow accessories to connect, under Privacy & Security, if you do not want to be asked to allow every time an accessory such as a Dongle is plugged in initially.
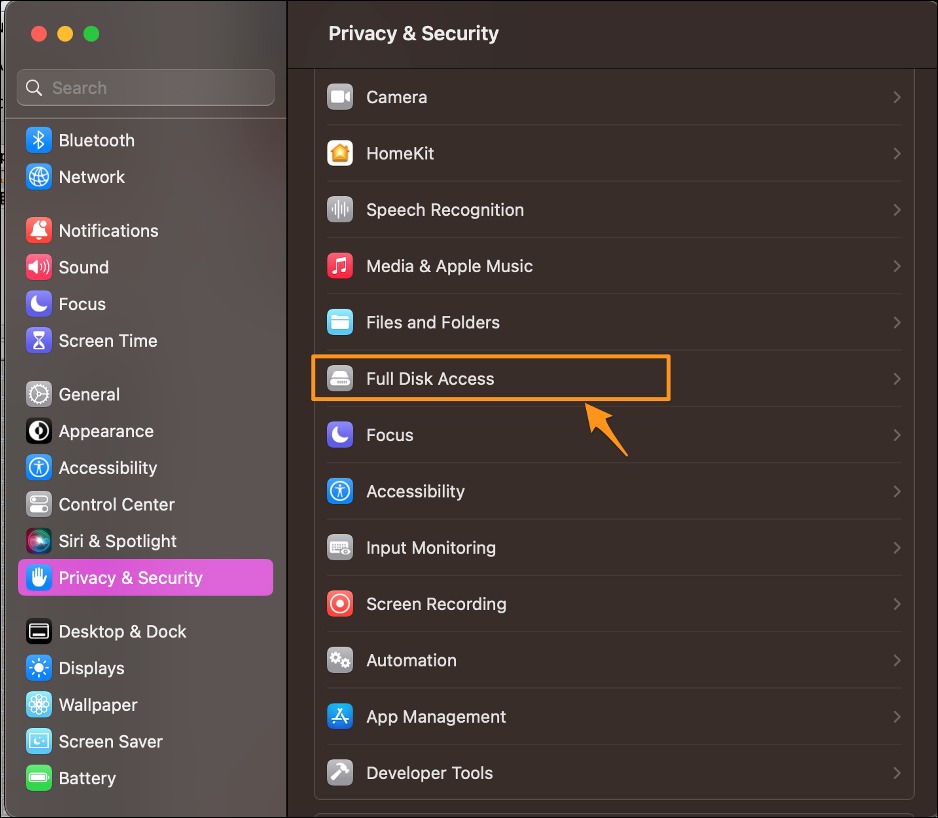
2. On the right panel, under Privacy & Security, select Full Disk Access
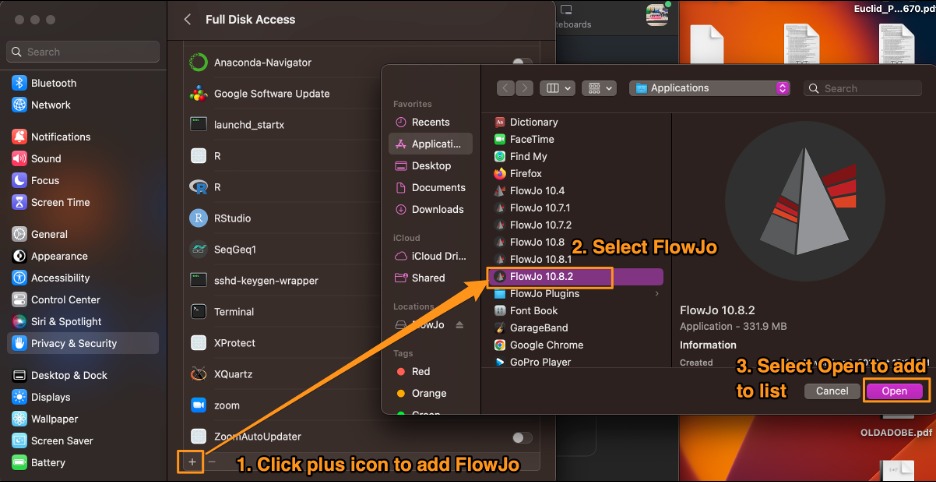
3. Then click the “+” to add FlowJo from your Applications folder. Once added, the circle should be ticked
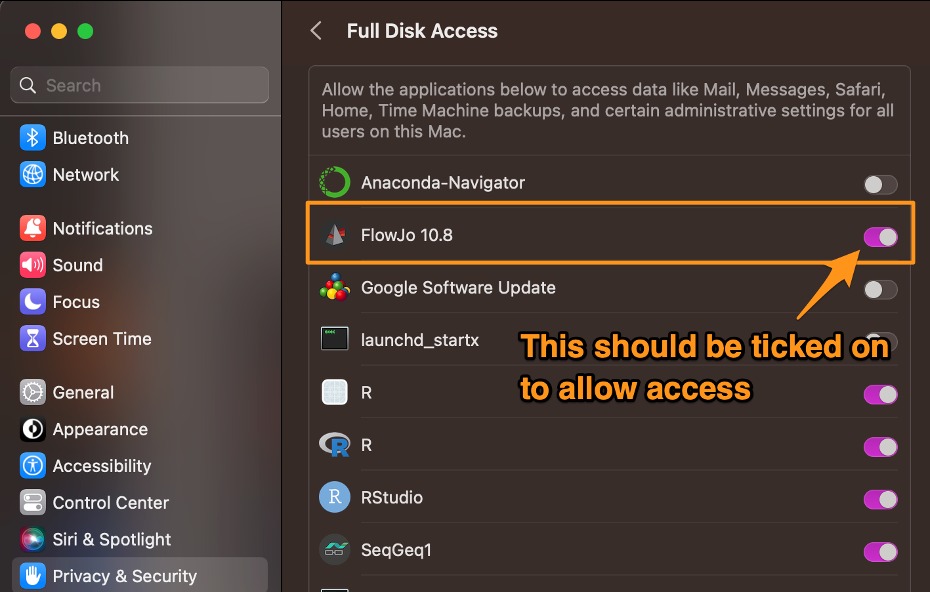
4. Once FlowJo is added to the list, the circle should be ticked on to allow access.
Full Instructions with Images:
1. Open up your MacOS System Settings (Apple icon -> System Setting) and select Privacy & Security from the list on the left-hand panel
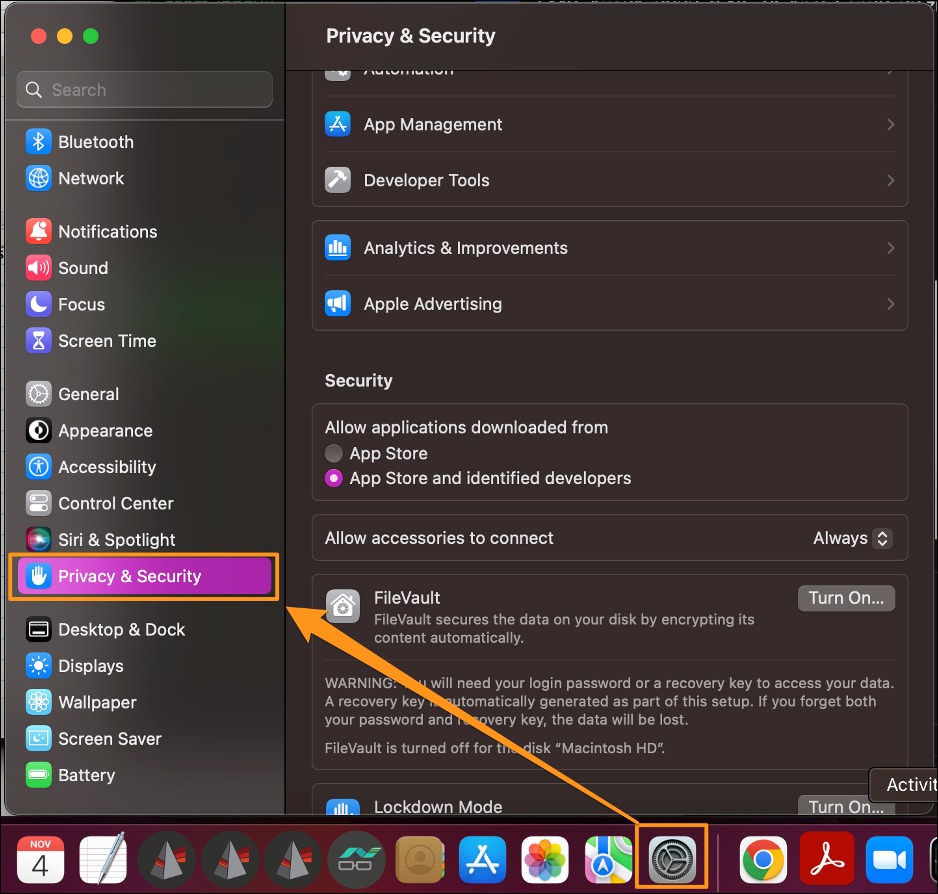
Note: you may want to select Always Allow accessories to connect shown in the above screenshot, under Privacy & Security, if you do not want to be asked to allow every time an accessory such as a Dongle is plugged in initially.
2. On the right panel, under Privacy & Security, select Full Disk Access
3. Then click the “+” to add FlowJo from your Applications folder.
4. Once FlowJo is added to the list, the circle should be ticked on to allow access.
5. Quit and restart FlowJo for MacOS permissions to apply.