Image sets are a means to curate interesting populations visually within the CellView Lens tool.
If there is a characteristic pattern within your cell images that you would like to study further that does not correlate with an easily identifiable threshold on one or few parameters, image sets can be used to select those cells in a straight-forward matter.
Creating an Image Set
Within the CellView Lens plugin, there is a checkbox for Show Image Sets:

Figure 1: Show Image Sets
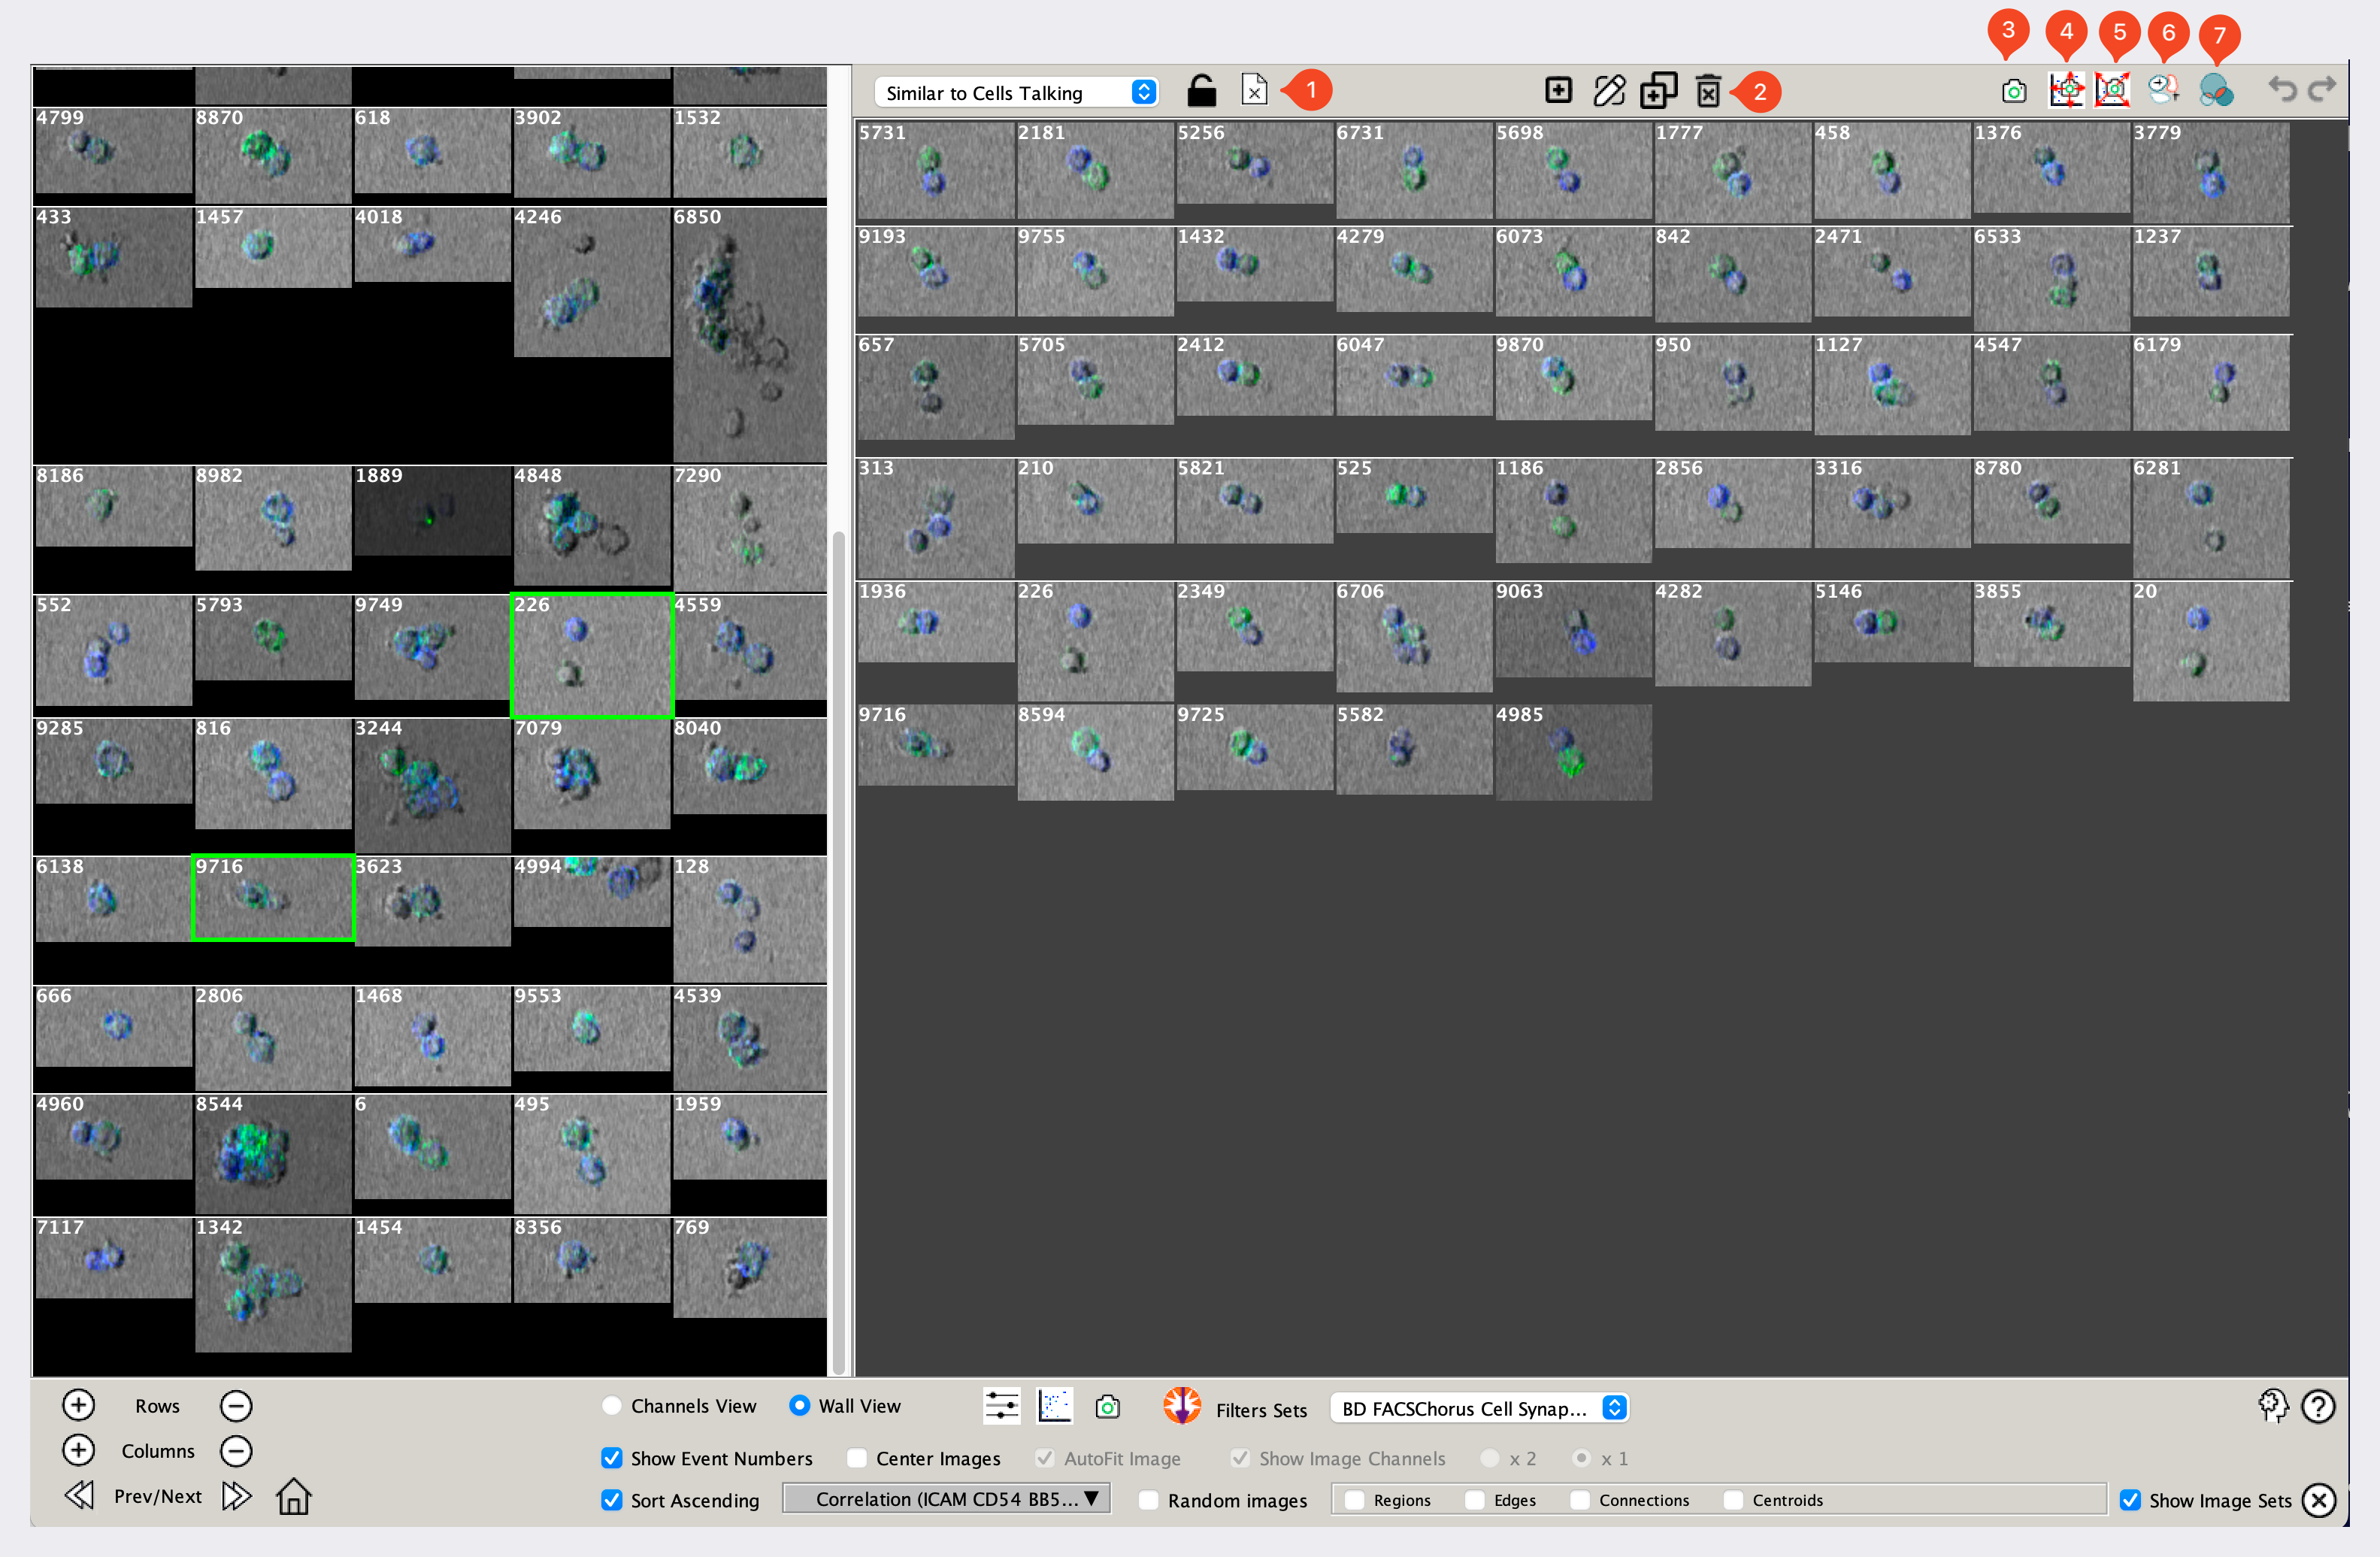
Checking this box opens a window that replaces the individual cell highlight window with a gallery that you can populate by clicking on images from the image wall. To modify an image set, you must click the lock icon to unlock it for editing. Then, simply click on images in the wall to add them. In Figure 2, Show Image Sets is checked, the lock icon is unlocked, and images that include both a cell expressing the green fluorescent probe indicating ICAM, and one expressing the blue fluorescent tag indicating LFA have been selected and added to the image wall. Selected cells are highlighted with the green border. The image wall on the left can be scrolled to see and select more cells within the chosen population. Selected cells appear on the right.
Delete an Image from an Image Set
You can delete an image from the image wall by selecting it and on a PC pressing the Delete Key on your Keyboard, and on a Mac holding down the fn key while clicking Delete on your keyboard.

| No. | Tool |
|---|---|
| 1 | Image set name, unlock, and remove all images from the set |
| 2 | Make a new image set, edit the name, duplicate a set, and delete the entire set |
| 3 | Add the images in the current image set to the layout editor |
| 4 | Create a 2D plot with image callouts, aligned around edges of the plot |
| 5 | Create a 2D plot with image callouts, aligned in quadrants |
| 6 | Find images similar to this set using selected measured parameters and a K-nearest neighbors algorithm |
| 7 | Create a population of these cells in the FlowJo hierarchy |
Figure 2: Image Set Controls
Image Set Tools
Figure 2 calls out a set of tools that can be applied to image sets. Call out 2 points to the tools for creating new image sets, duplicating or deleting them, and renaming them. You can make as many image sets as you need and select a set to view from the dropdown menu identified in call out 1. Also in callout 1 is the unlock icon. To prevent accidental modification, image sets are locked by default. To modify the selected image set, click the unlock icon.
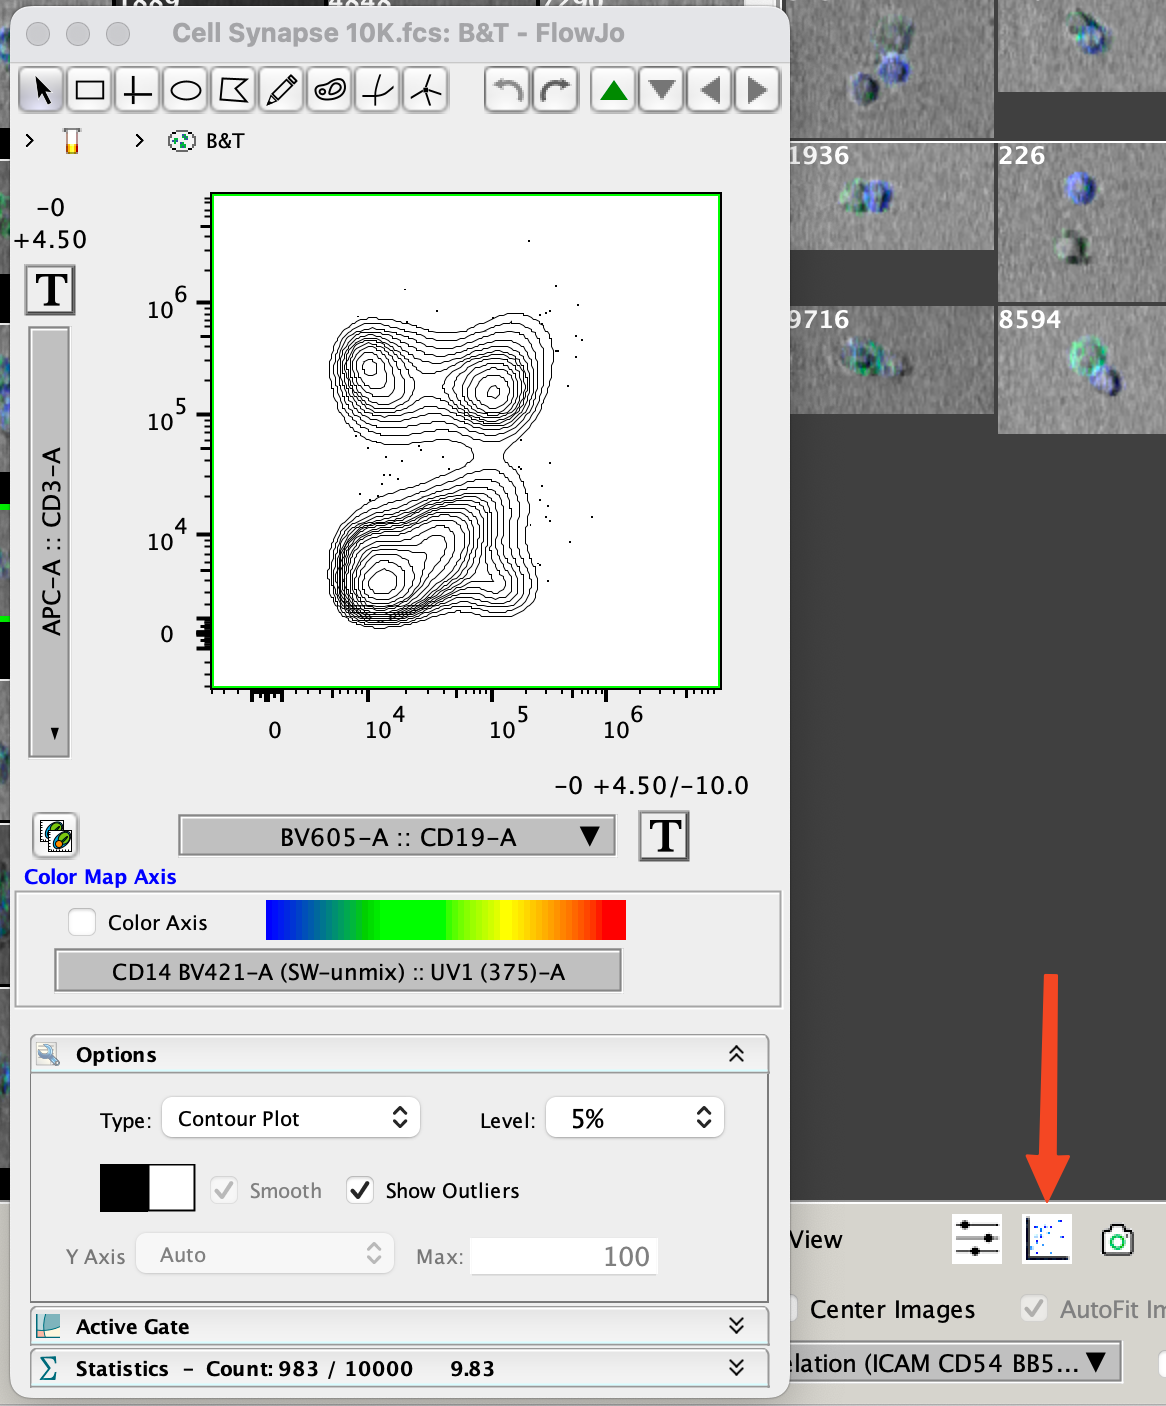
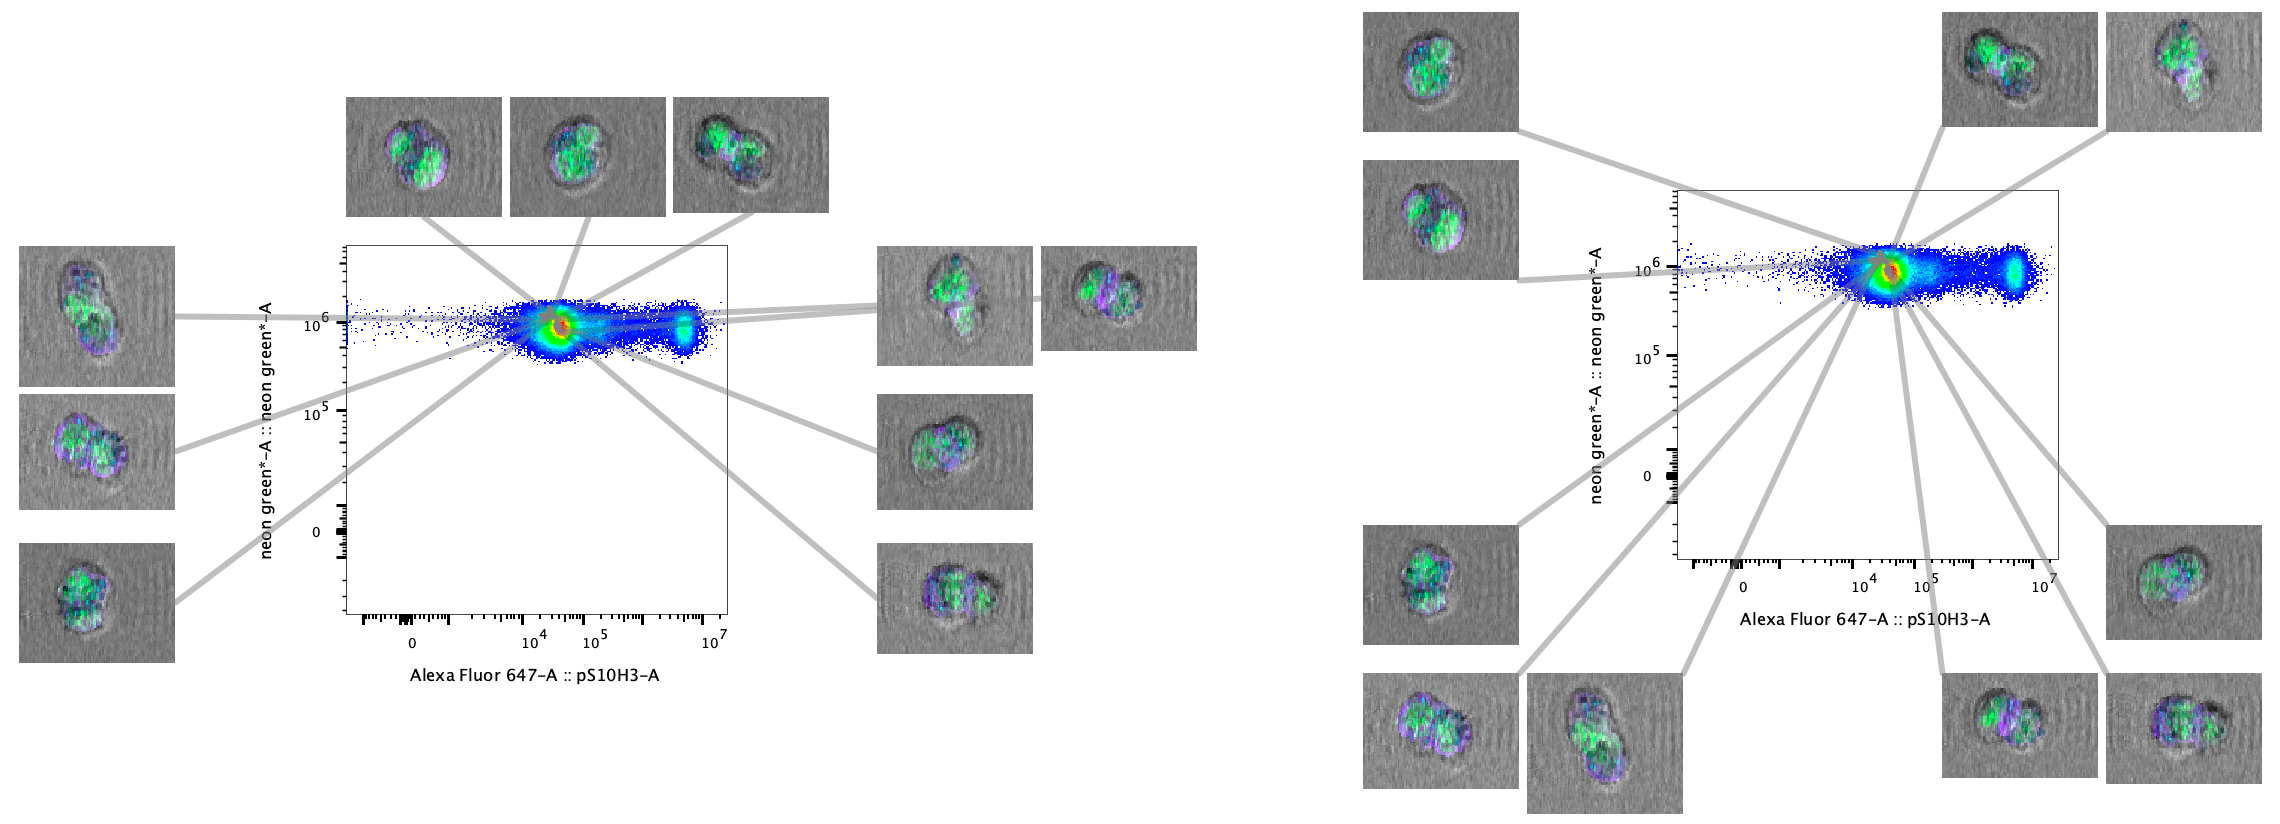
Call outs 3-5 are a variety of ways to represent an image set in the layout editor. Call out 3 will create a graphic of the wall of images in the image set. If a 2D plot has been created for these images, as shown in Figure 3 (click the icon, mouse over the plot that appears until the edges turn green, select parameters for viewing on the axis), call out 4 will create a graph in the layout editor of the selected 2D plot with the images in the set's position indicated, and the images placed along the border of the plot. Call out 5 will do the same, but arrange the images in quadrants. Examples of these plots are shown in Figure 4.

Figure 3 Initiating a 2D plot for mouseover of images

Figure 4 Image sets shown in the layout editor with a 2D plot for reference. The left plot shows images arranged along the edges of the 2D plot, the right plot shows images arranged by quadrant.
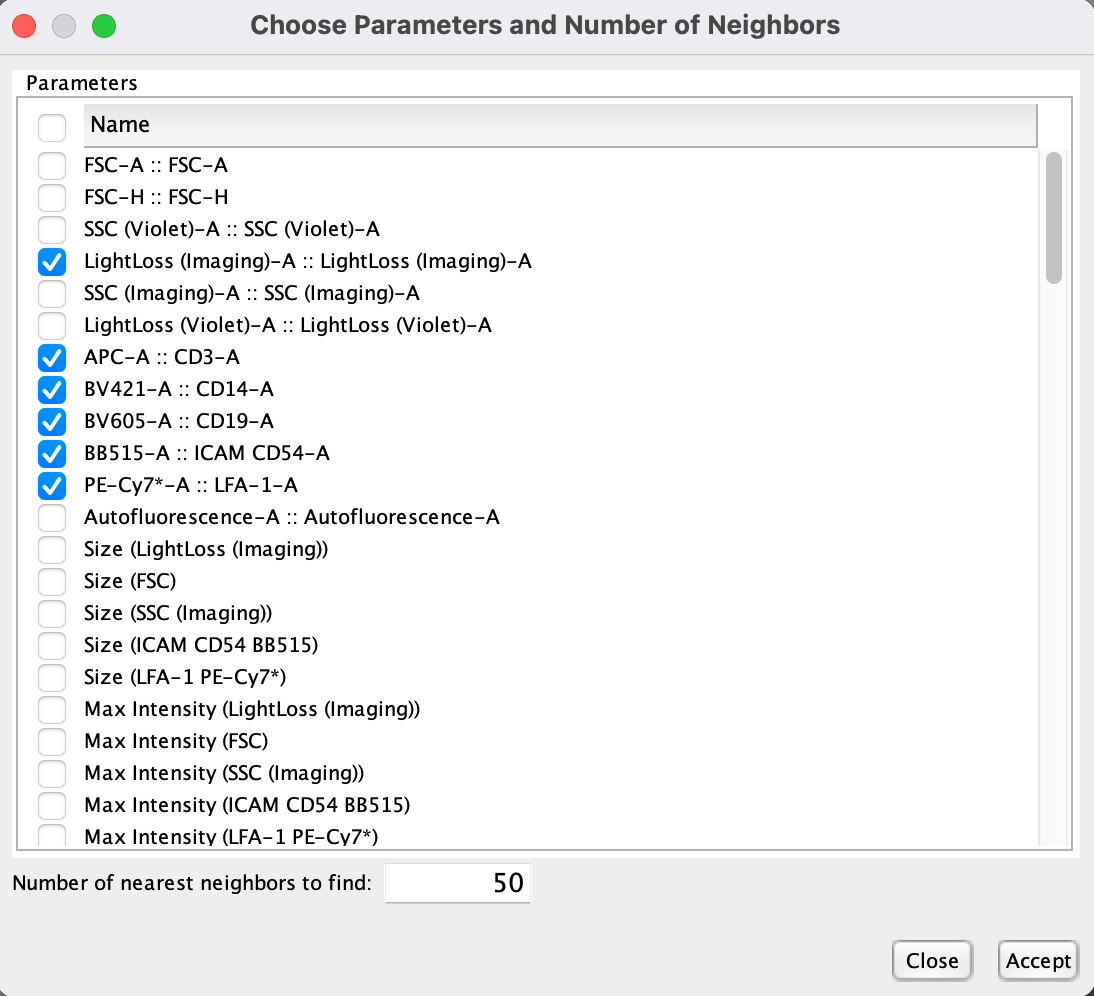
Call out 6 in Figure 2 is the button for finding similar images using a Nearest Neighbors Search tool, operating on the numeric parameters, both measured and derived. On clicking this button the window shown in Figure 5 will appear. Select any parameters that might contain information that may be useful for determining if a cell is similar to the set of cells selected in your image set. For example, if you wanted to find round cells that were CD3+ CD19-, you would select the fluorescent markers for CD3 and CD19, and the eccentricity of side scatter. The algorithm will rank all of the events in the selected population from most similar to least and return the top 50 (by default). You may change the number of nearest neighbors to find if you want more. Click Accept that the algorithm will run, producing a new image set called 'Similar to...' whatever the original hand-curated set was called.

Figure 5 Parameter selection for finding similar cells
Once you have identified a set of interesting cells you can click call out 7 to create a population in the workspace hierarchy from this image set. You will get these events isolated, as well as a not-gate of the rest of the events in the population. Further work can be done on this population, like any other population in FlowJo, including using Hyperfinder to recapitulate this set of cells using traditional gating to see which parameters distinguish these cells.
